In Rancher 2.1.0 they added support for SAML authentication with Keycloak. What this means is Rancher will use a Keycloak realm to authenticate users.
This means that there is one place to manage users for a host of your applications. It also means that if they have logged on to the realm with their browser they can have single sign on to rancher – ie. they will already be logged into rancher.
The documentation on Rancher setting up Keycloak auth is already pretty good, however certain things can get tricky espescially if you are using Keycloak 7 and up.
So let’s jump in and set it up…
Prerequisites
- A Keycloak Identity Provider Setup
- A Rancher Instance
Setting up the Rancher Client on Keycloak
In keycloak you already have a realm and user’s eith local or federated from LDAP.
So now we need to create the client for Rancher.
Go to Clients -> Create:
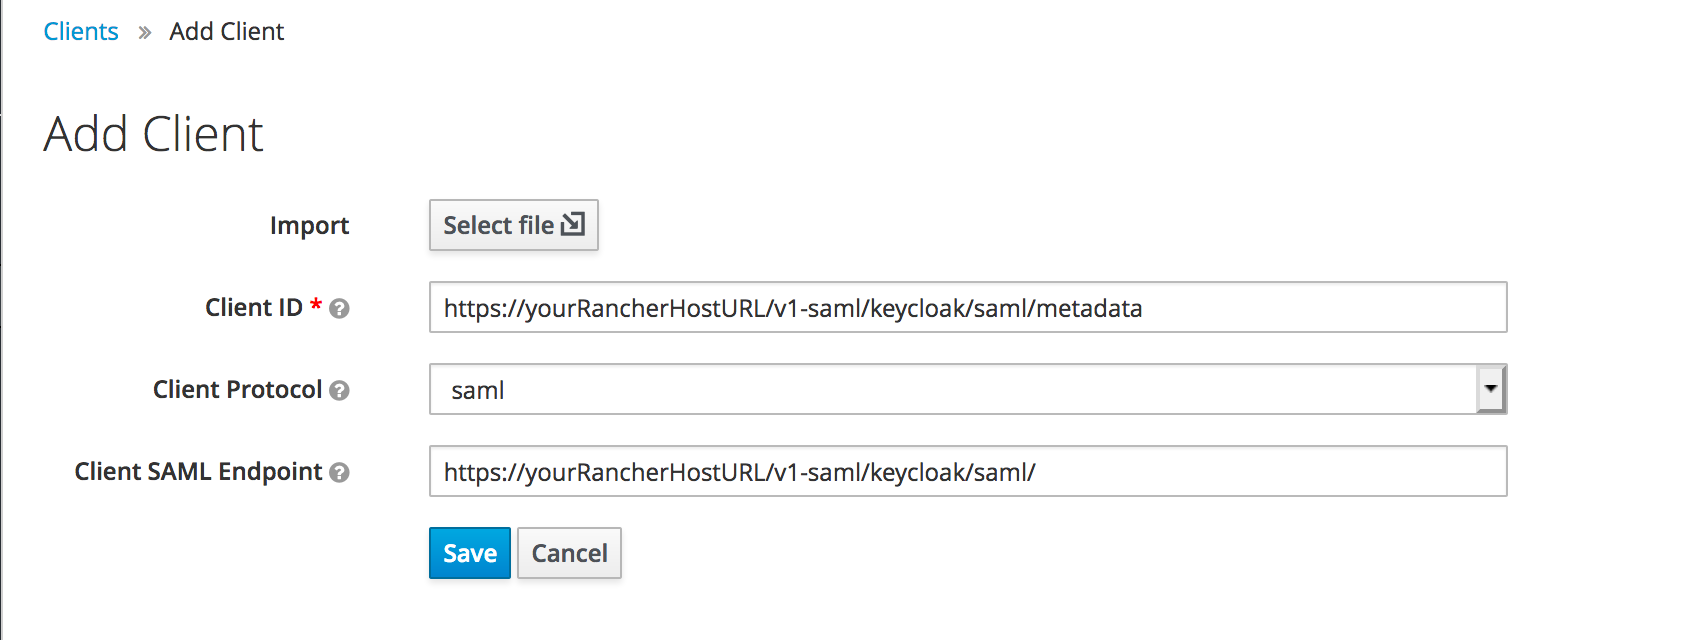
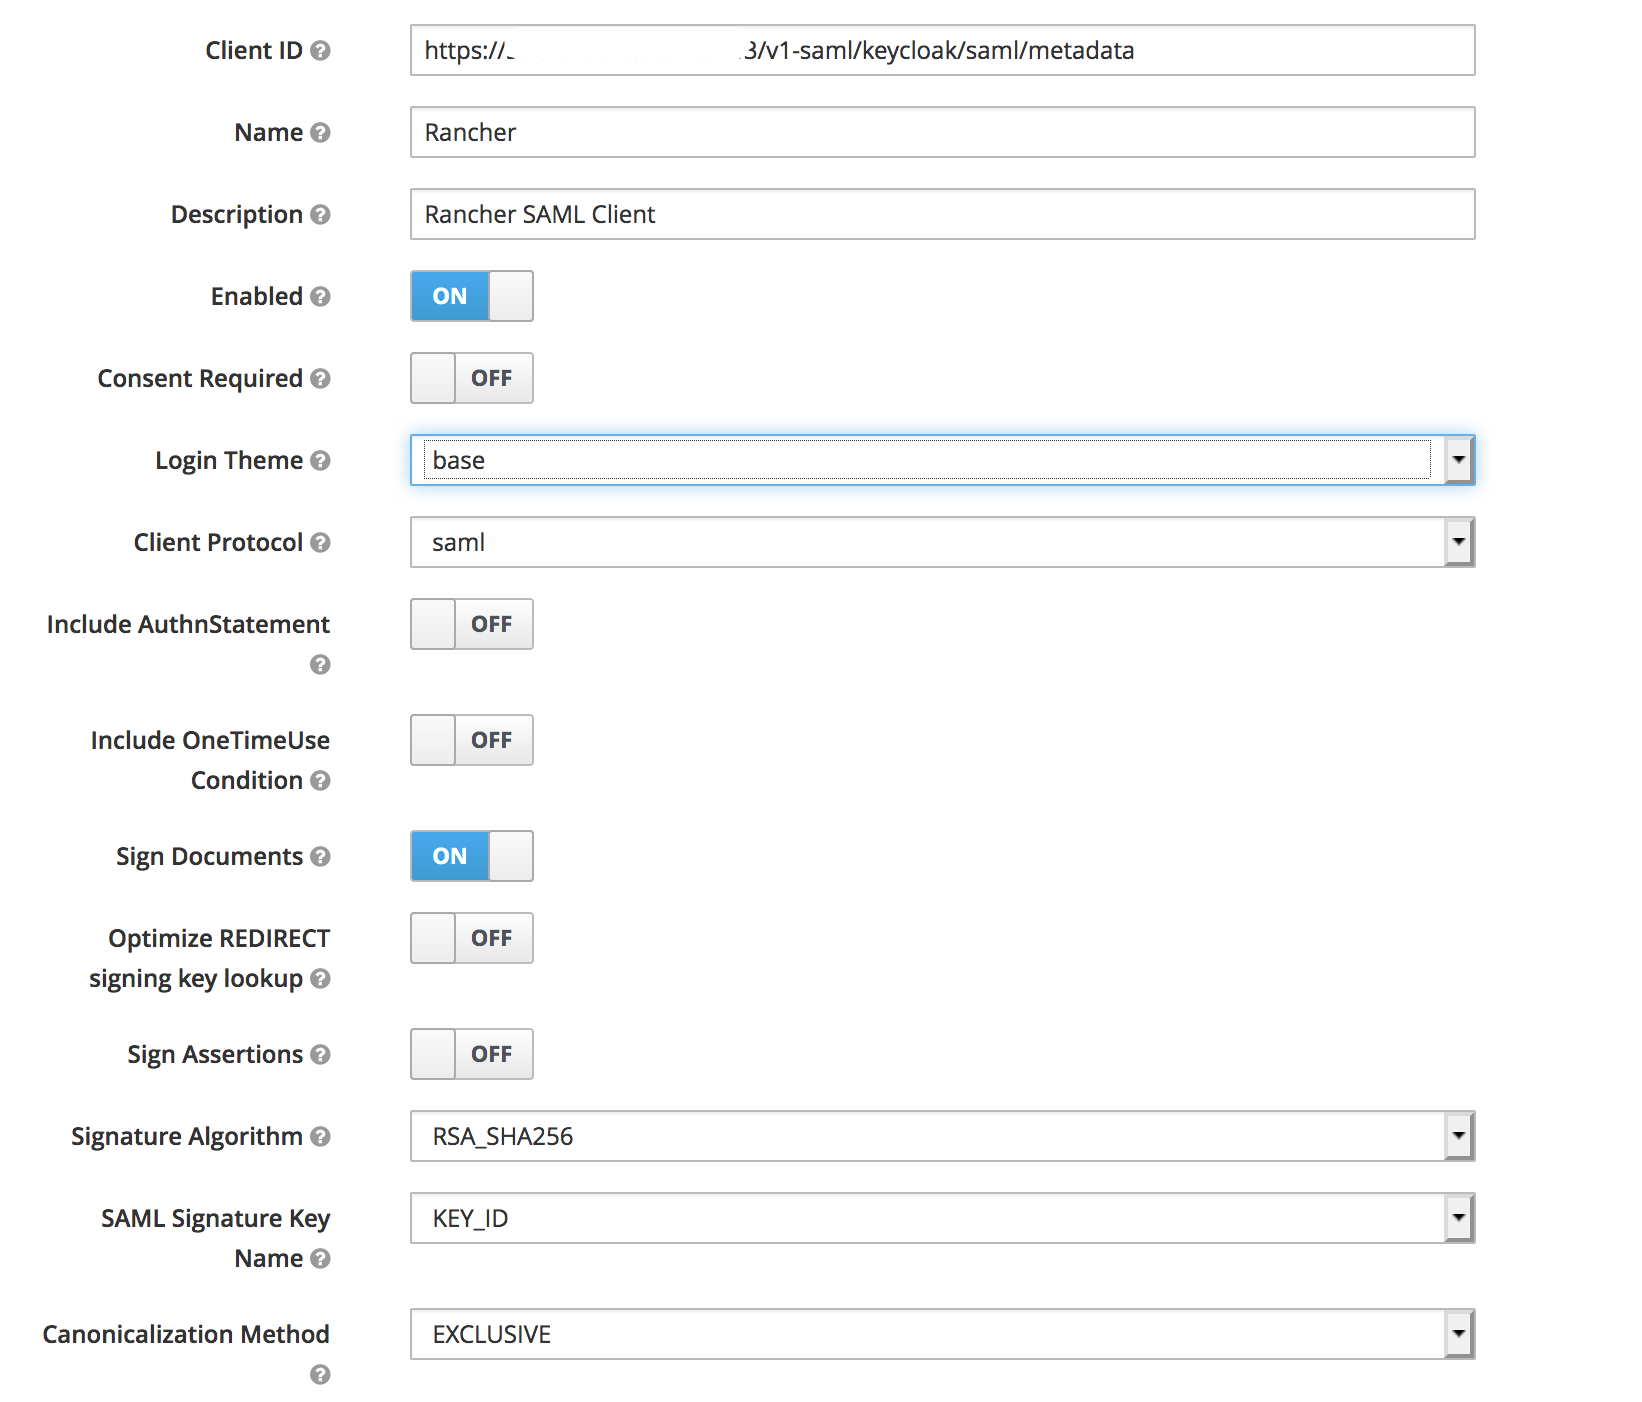
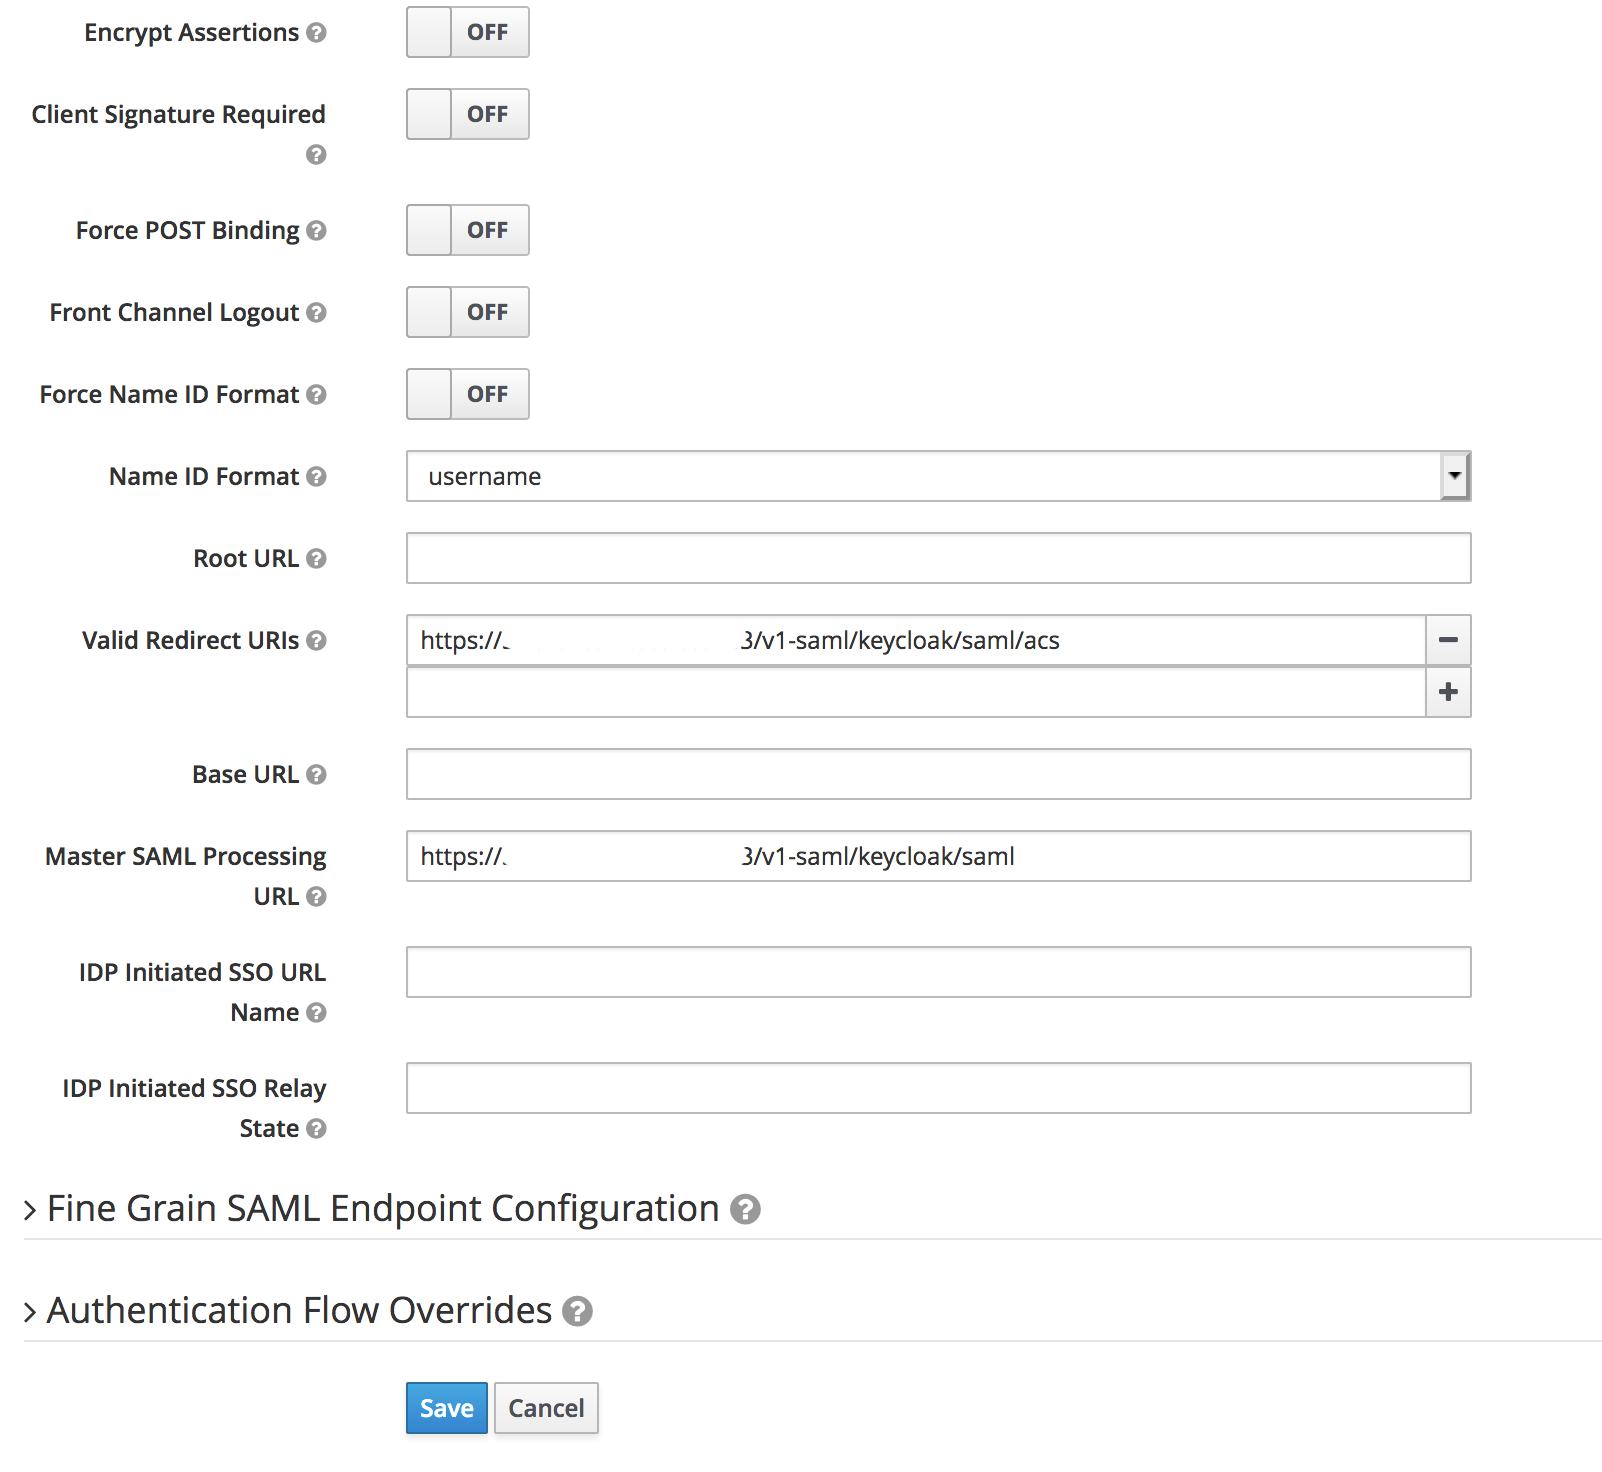
Now add the following extra settings (replace the white box with your Rancher URL):
 Boom, we’ve setup the keycloak side. Now we just need to export this config to load onto the rancher side.
Usually this would be done on the Installation tab of the client. However rancher wants the SAML Metadata IDPSSODescriptor but Keycloak 7 does not provide that.
The way to get it is to go to this URL:
https://{KEYCLOAK-URL}/auth/realms/{REALM-NAME}/protocol/saml/descriptor
and save that XML to a file.
You then need to copy all the properties of EntitiesDescriptor and add them to the first EntityDescriptor. Then delete the EntitiesDescriptor element.
Now save that and it will be the config to import.
Setting up Keycloak Auth on Rancher
Open Rancher on the Global scope and select Security -> Authentication:
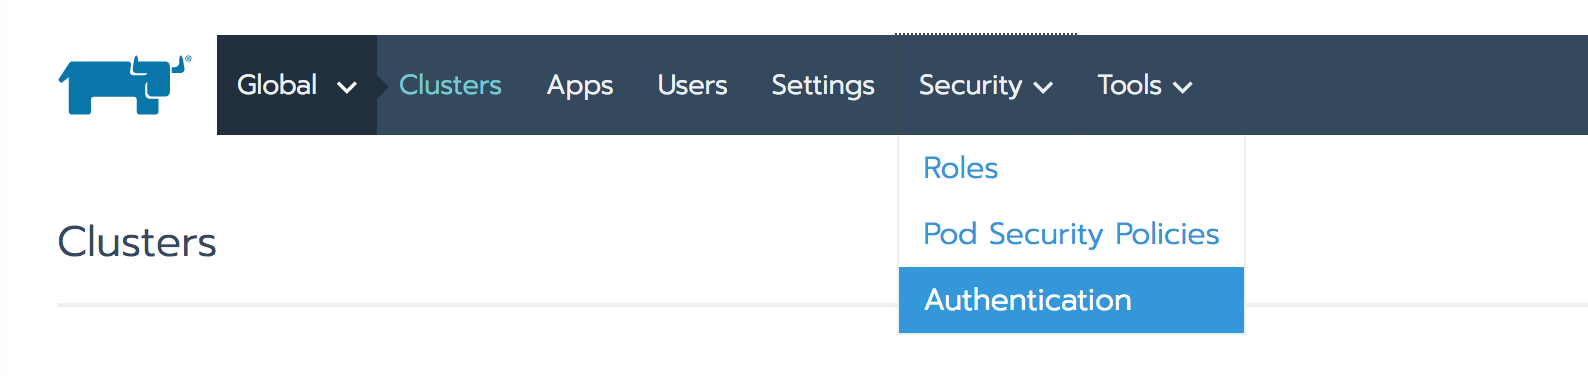
You will get a few authentication / identity provider options:

Select Keycloak and you will need the following information.
| Field | Description |
|---|---|
| Display Name Field | The AD attribute that contains the display name of users. |
| User Name Field | The AD attribute that contains the user name/given name. |
| UID Field | An AD attribute that is unique to every user. |
| Groups Field | Make entries for managing group memberships. |
| Rancher API Host | The URL for your Rancher Server. |
| Private Key / Certificate | A key/certificate pair to create a secure shell between Rancher and your IdP. |
| IDP-metadata | The metadata.xml file that you exported from your IdP server. |
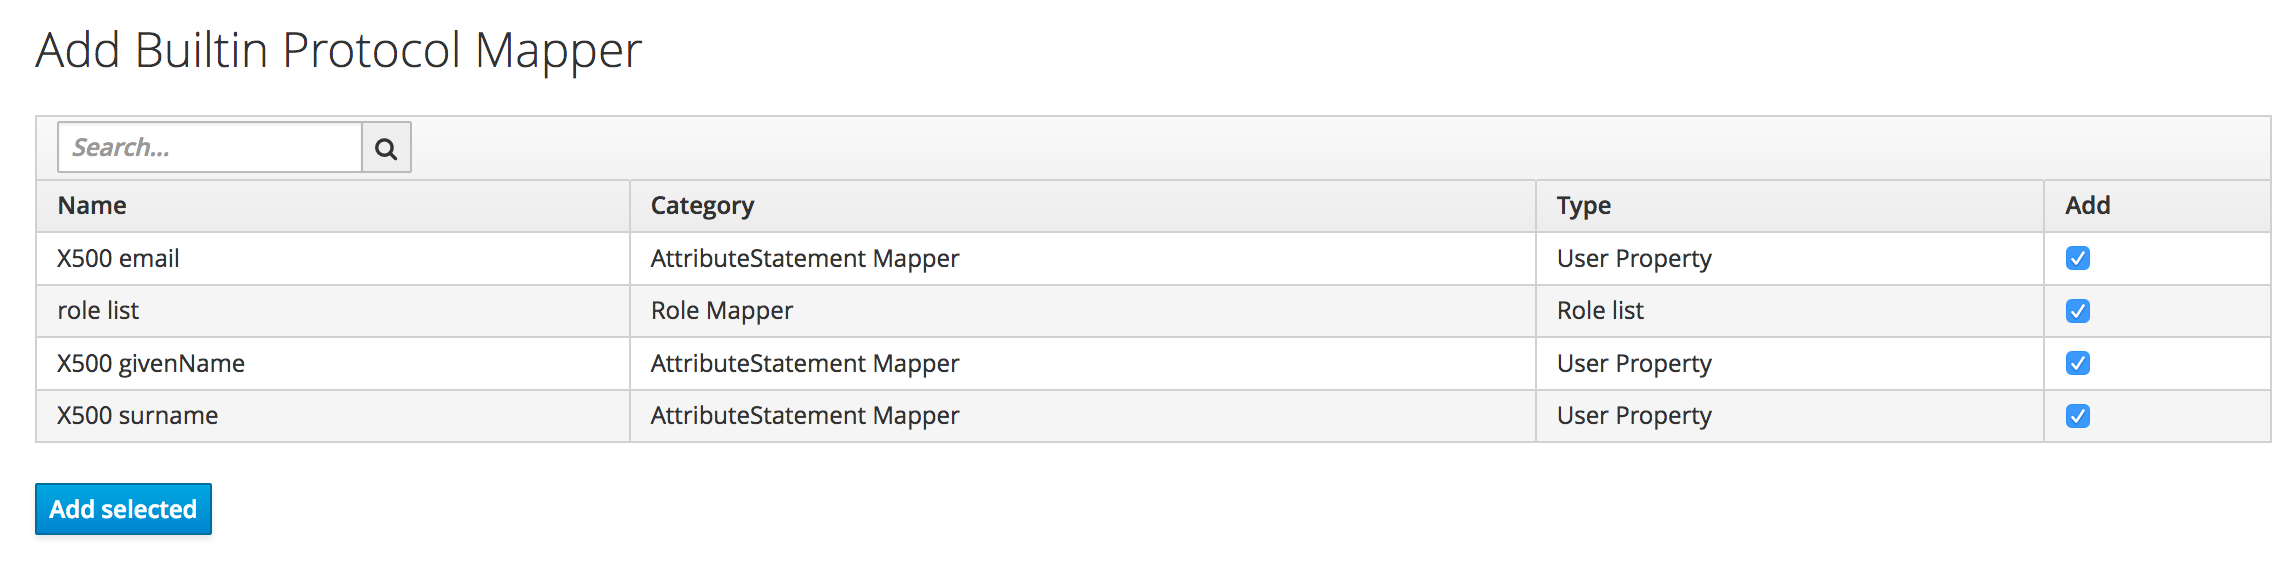
These AD Attributes are set on the Keycloak side at Client -> Mappers, the best thing to do is add builtin on the rancher side:

That will add the defualt attributes and it is best to add those, however for access to the groups of the user you need to map a group list attribute.
You would use the protocol mapper below, to map the member attribute on rancher side to a user’s group list.
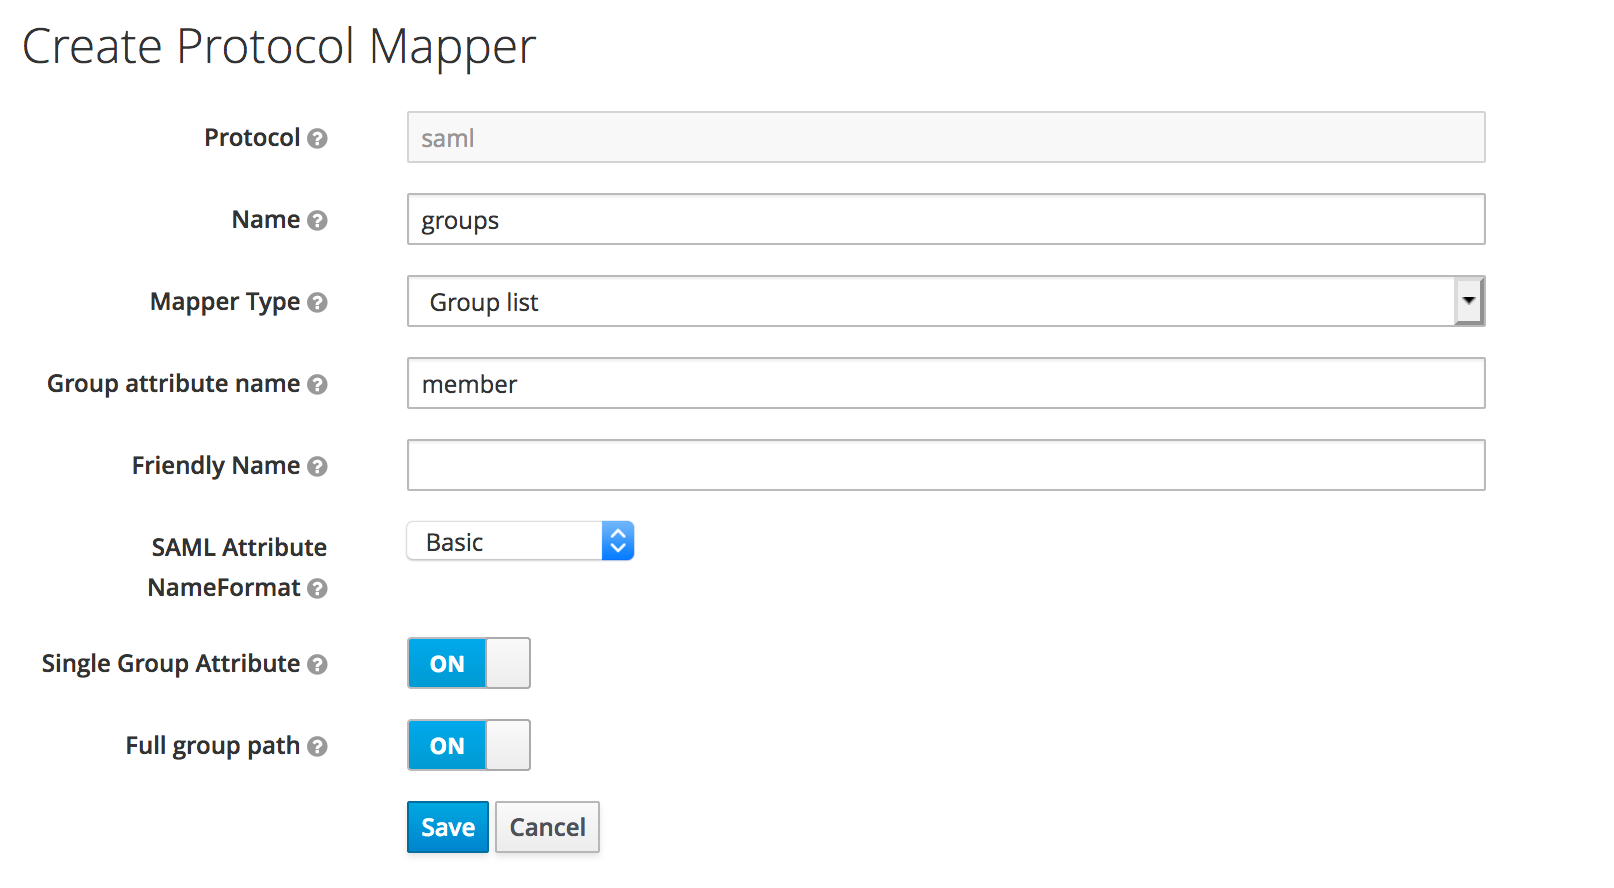
So to view the SAML attribute name just open one of the mappers and use the Friendly Name.
In my case:
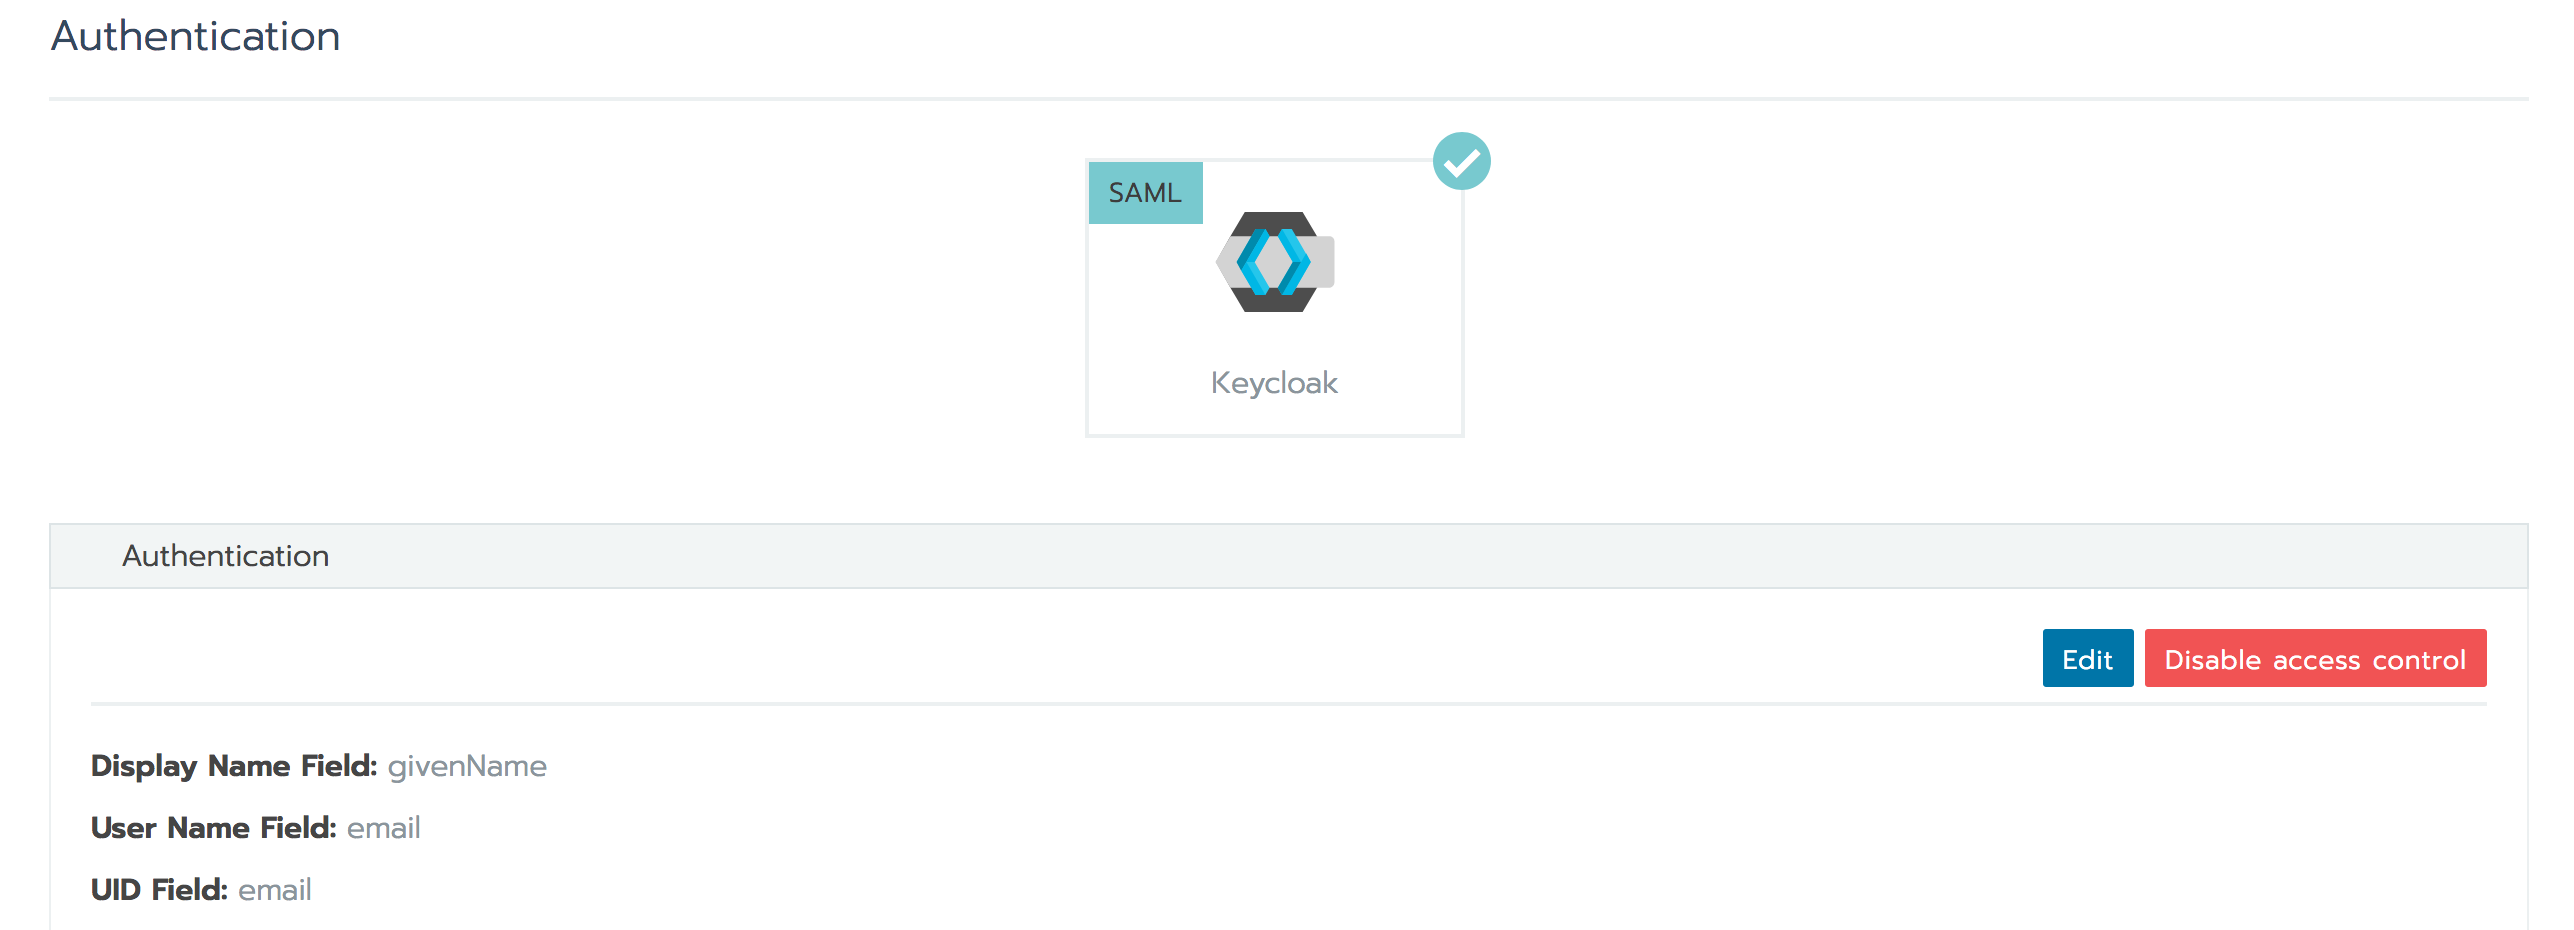
If successful you will be presented with this screen. If you are not successful and you have the invalid SAML attributes error, then you need to fix your attribute names.
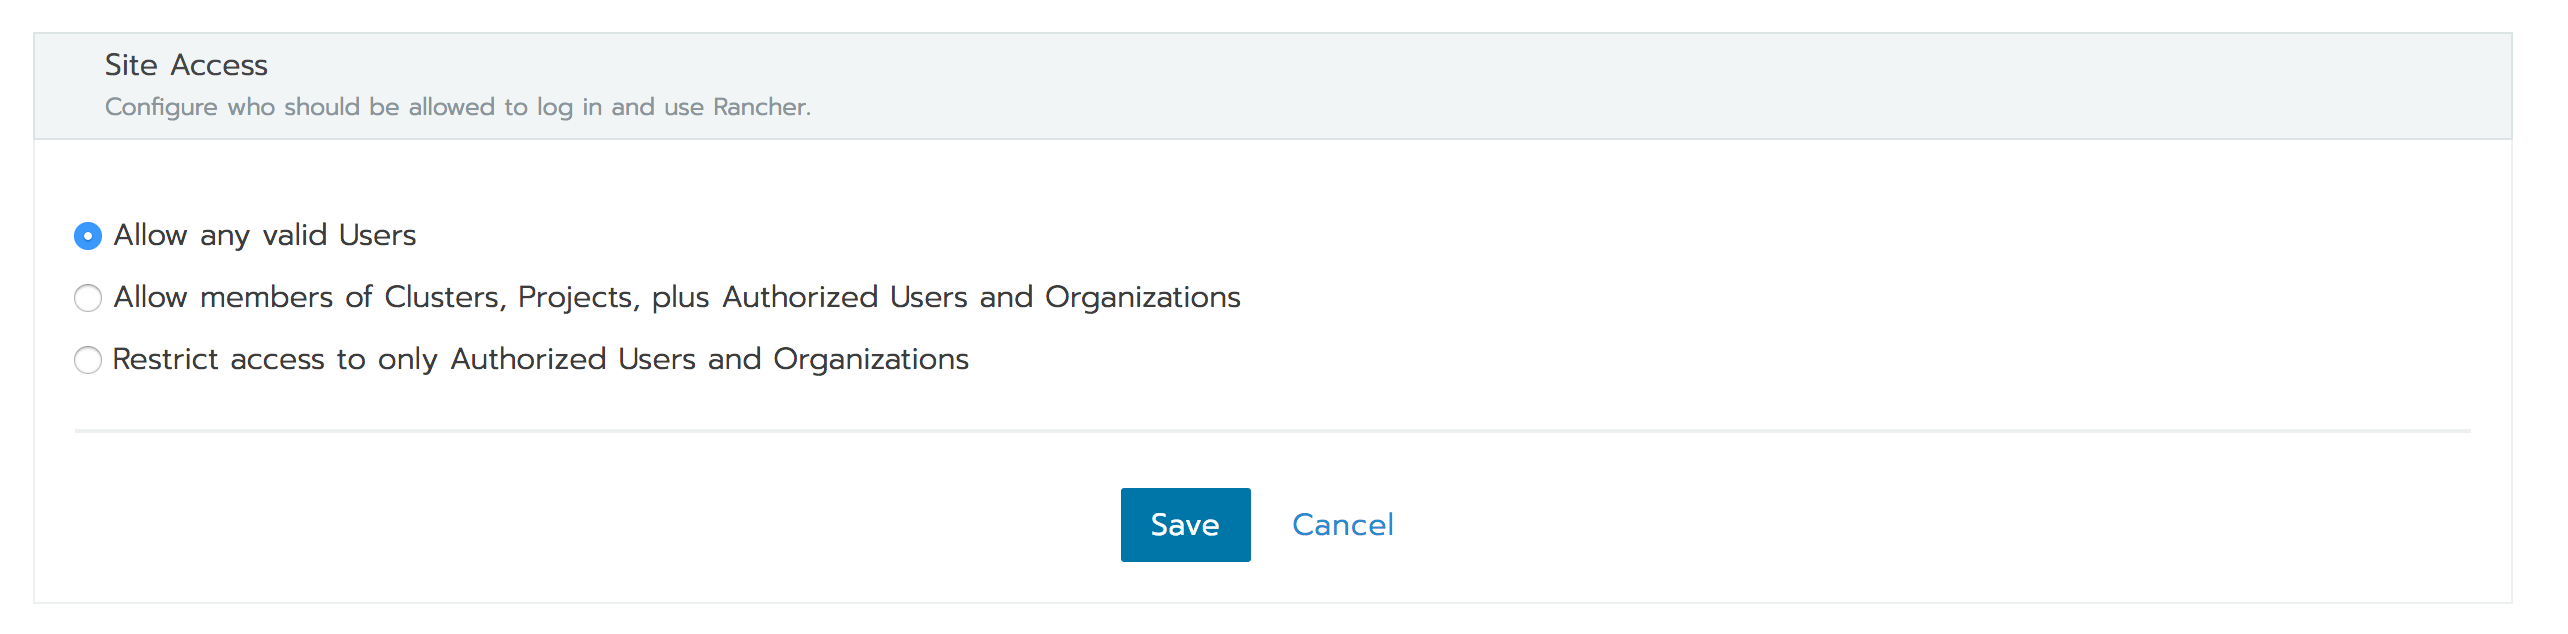
If you only want to allow members of certain groups on the keycloak realm then you can change the options below:
So How has Our Lives Improved Since Implementing SSO
- A central place for authentication, you don’t need to manage much about auth on your application side.
- Deletage auth and turn Time-based One Time Pin, Add terms and conditions and giving access with a simple button switch.
- You get SSO (single sign on): sign on to the realm and now you can simply press the login button on any other linked client and you will be logged in.
- Single sign off – I tested this and it did not work. Logging out of one client kept you in the other client.
Single Sign Out
During my testing single sign out was not working. However I must mention my setup was 3 parts:
- Keycloak on a VM accessible only on the local network
- A Django App in a docker container on my local machine
- Rancher also accessible on the local network
So my guess is that when using the front channel (browser) for the authentication step on the django client, it works because the redirect from the client goes to the docker container.
However when the logout is sent on the backchannel, it can’t access 0.0.0.0:8000 as there isn’t a proper DNS entry.
What I am going to do is deploy the docker container on Openshift (god bless my soul)…and set an ip or dns so that keycloak can access it on the back channel.