This is a few pointers to use when setting up MySQL Workbench.
MySQL Workbench is a UI for using mySQL. It makes it easy to manage, create and modify your databases. It also gives tools to model a well structured database for any project you may have.
MySQL Workbench with XAMPP tutorial Setup
-
Start MySQL, either with XAMPP control panel or manually if you have installed it seperately (not as a stack)
-
Open MySQL Workbench, it is free and can be downloaded here: MySQL Workbench Download
-
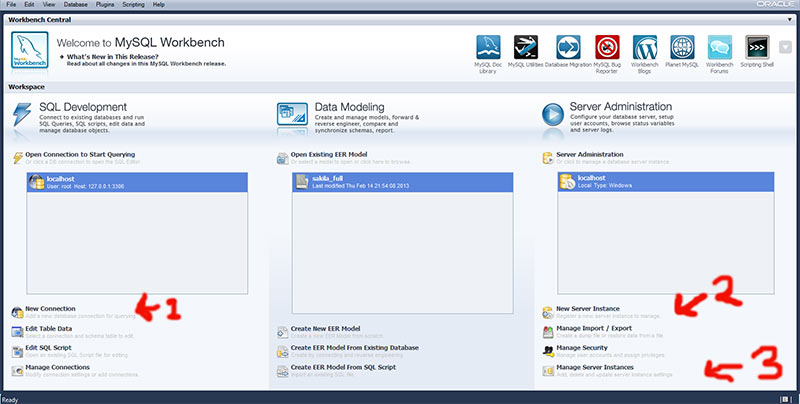
You will be faced with this screen (Without any db’s added), click "New Connection" (Number ‘1’ on the image)
-
Add new connection, default settings will be localhost so name it "localhost" and fill in your password etc.
-
Then Click "New Server Instance" on the right (Number 2 on the image)
-
Click next next next everything should be OK.
-
If you try to connect it will fail, it’ll say something about WMI. So click "Manage Server Instance" (number 3 on the image), make sure you have the correct database selected (probably localhost). Next click "Manage Connections…". Now Once the window has opened you do not need to do anything just close it.
-
Now you can double click "localhost" under "Server Administration" and you can administer your server. Then double click open connection to start querying on the left and you can start creating and querying tables in your database.